 【设计模式】4. 行为模式
# 行为模式
行为模式负责对象间的高效沟通和职责委派。
- 责任链模式 ★
- 命令模式 ★★★
- 迭代器模式 ★★★
- 中介者模式
- 备忘录模式 ★
- 观察者模式 ★★★
- 状态模式 ★★
- 策略模式 ★★★
- 模板方法模式 ★★
- 访问者模式 ★★
# 责任链模式 ★
# 1. 特点
责任链模式是一种行为设计模式, 允许你将请求沿着处理者链进行发送。 收到请求后, 每个处理者均可对请求进行处理, 或将其传递给链上的下个处理者。
- 该模式允许多个对象来对请求进行处理, 而无需让发送者类与具体接收者类相耦合。 链可在运行时由遵循标准处理者接口的任意处理者动态生成。

适合应用场景
- 当程序需要使用不同方式处理不同种类请求, 而且请求类型和顺序预先未知时, 可以使用责任链模式。
- 当必须按顺序执行多个处理者时, 可以使用该模式。
- 如果所需处理者及其顺序必须在运行时进行改变, 可以使用责任链模式。
优缺点
- 优点
- 你可以控制请求处理的顺序。
- 单一职责原则。 你可对发起操作和执行操作的类进行解耦。
- 开闭原则。 你可以在不更改现有代码的情况下在程序中新增处理者。
- 缺点
- 部分请求可能未被处理。
- 优点
与其他模式的关系
- 责任链模式、 命令模式、 中介者模式和观察者模式用于处理请求发送者和接收者之间的不同连接方式:
- 责任链按照顺序将请求动态传递给一系列的潜在接收者, 直至其中一名接收者对请求进行处理。
- 命令在发送者和请求者之间建立单向连接。
- 中介者清除了发送者和请求者之间的直接连接, 强制它们通过一个中介对象进行间接沟通。
- 观察者允许接收者动态地订阅或取消接收请求。
- 责任链通常和组合模式结合使用。 在这种情况下, 叶组件接收到请求后, 可以将请求沿包含全体父组件的链一直传递至对象树的底部。
- 责任链的管理者可使用命令模式实现。 在这种情况下, 你可以对由请求代表的同一个上下文对象执行许多不同的操作。
- 还有另外一种实现方式, 那就是请求自身就是一个命令对象。 在这种情况下, 你可以对由一系列不同上下文连接而成的链执行相同的操作。
- 责任链和装饰模式的类结构非常相似。 两者都依赖递归组合将需要执行的操作传递给一系列对象。 但是, 两者有几点重要的不同之处。
- 责任链的管理者可以相互独立地执行一切操作, 还可以随时停止传递请求。 另一方面, 各种装饰可以在遵循基本接口的情况下扩展对象的行为。 此外, 装饰无法中断请求的传递。
- 责任链模式、 命令模式、 中介者模式和观察者模式用于处理请求发送者和接收者之间的不同连接方式:
# 2. 示例
// 处理者接口
package main

type Department interface {
    execute(*Patient)
    setNext(Department)
}

// 具体处理者

type Reception struct {
    next Department
}

func (r *Reception) execute(p *Patient) {
    if p.registrationDone {
        fmt.Println("Patient registration already done")
        r.next.execute(p)
        return
    }
    fmt.Println("Reception registering patient")
    p.registrationDone = true
    r.next.execute(p)
}

func (r *Reception) setNext(next Department) {
    r.next = next
}

type Doctor struct {
    next Department
}

func (d *Doctor) execute(p *Patient) {
    if p.doctorCheckUpDone {
        fmt.Println("Doctor checkup already done")
        d.next.execute(p)
        return
    }
    fmt.Println("Doctor checking patient")
    p.doctorCheckUpDone = true
    d.next.execute(p)
}

func (d *Doctor) setNext(next Department) {
    d.next = next
}


type Medical struct {
    next Department
}

func (m *Medical) execute(p *Patient) {
    if p.medicineDone {
        fmt.Println("Medicine already given to patient")
        m.next.execute(p)
        return
    }
    fmt.Println("Medical giving medicine to patient")
    p.medicineDone = true
    m.next.execute(p)
}

func (m *Medical) setNext(next Department) {
    m.next = next
}


type Cashier struct {
    next Department
}

func (c *Cashier) execute(p *Patient) {
    if p.paymentDone {
        fmt.Println("Payment Done")
    }
    fmt.Println("Cashier getting money from patient patient")
}

func (c *Cashier) setNext(next Department) {
    c.next = next
}


type Patient struct {
    name              string
    registrationDone  bool
    doctorCheckUpDone bool
    medicineDone      bool
    paymentDone       bool
}

// main
func main() {

    cashier := &Cashier{}

    //Set next for medical department
    medical := &Medical{}
    medical.setNext(cashier)

    //Set next for doctor department
    doctor := &Doctor{}
    doctor.setNext(medical)

    //Set next for reception department
    reception := &Reception{}
    reception.setNext(doctor)

    patient := &Patient{name: "abc"}
    //Patient visiting
    reception.execute(patient)
}
2
3
4
5
6
7
8
9
10
11
12
13
14
15
16
17
18
19
20
21
22
23
24
25
26
27
28
29
30
31
32
33
34
35
36
37
38
39
40
41
42
43
44
45
46
47
48
49
50
51
52
53
54
55
56
57
58
59
60
61
62
63
64
65
66
67
68
69
70
71
72
73
74
75
76
77
78
79
80
81
82
83
84
85
86
87
88
89
90
91
92
93
94
95
96
97
98
99
100
101
102
103
104
105
106
107
108
109
110
111
112
113
114
# 命令模式 ★★★
别称: 动作、事务、Action、Transaction、Command
# 1. 特点
命令模式是一种行为设计模式, 它可将请求转换为一个包含与请求相关的所有信息的独立对象。 该转换让你能根据不同的请求将方法参数化、 延迟请求执行或将其放入队列中, 且能实现可撤销操作。
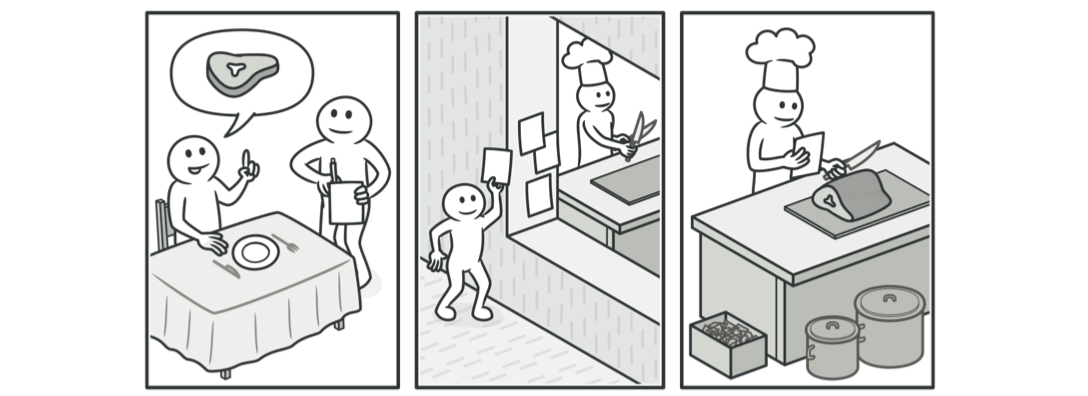
在市中心逛了很久的街后, 你找到了一家不错的餐厅, 坐在了临窗的座位上。 一名友善的服务员走近你, 迅速记下你点的食物, 写在一张纸上。 服务员来到厨房, 把订单贴在墙上。 过了一段时间, 厨师拿到了订单, 他根据订单来准备食物。 厨师将做好的食物和订单一起放在托盘上。 服务员看到托盘后对订单进行检查, 确保所有食物都是你要的, 然后将食物放到了你的桌上。
那张纸就是一个命令, 它在厨师开始烹饪前一直位于队列中。 命令中包含与烹饪这些食物相关的所有信息。 厨师能够根据它马上开始烹饪, 而无需跑来直接和你确认订单详情。
适合应用场景
如果你需要通过操作来参数化对象, 可使用命令模式。
如果你想要将操作放入队列中、 操作的执行或者远程执行操作, 可使用命令模式。
如果你想要实现操作回滚功能, 可使用命令模式。
尽管有很多方法可以实现撤销和恢复功能, 但命令模式可能是其中最常用的一种。
为了能够回滚操作, 你需要实现已执行操作的历史记录功能。 命令历史记录是一种包含所有已执行命令对象及其相关程序状态备份的栈结构。
这种方法有两个缺点。 首先, 程序状态的保存功能并不容易实现, 因为部分状态可能是私有的。 你可以使用备忘录 (opens new window)模式来在一定程度上解决这个问题。
其次, 备份状态可能会占用大量内存。 因此, 有时你需要借助另一种实现方式: 命令无需恢复原始状态, 而是执行反向操作。 反向操作也有代价: 它可能会很难甚至是无法实现。
优缺点
- 优点
- 单一职责原则。 你可以解耦触发和执行操作的类。
- 开闭原则。 你可以在不修改已有客户端代码的情况下在程序中创建新的命令。
- 你可以实现撤销和恢复功能。
- 你可以实现操作的延迟执行。
- 你可以将一组简单命令组合成一个复杂命令。
- 缺点
- 代码可能会变得更加复杂, 因为你在发送者和接收者之间增加了一个全新的层次。
- 优点
与其他模式的关系
- 责任链模式、 命令模式、 中介者模式和观察者模式用于处理请求发送者和接收者之间的不同连接方式:
- 责任链按照顺序将请求动态传递给一系列的潜在接收者, 直至其中一名接收者对请求进行处理。
- 命令在发送者和请求者之间建立单向连接。
- 中介者清除了发送者和请求者之间的直接连接, 强制它们通过一个中介对象进行间接沟通。
- 观察者允许接收者动态地订阅或取消接收请求。
- 责任链的管理者可使用命令模式实现。 在这种情况下, 你可以对由请求代表的同一个上下文对象执行许多不同的操作。还有另外一种实现方式, 那就是请求自身就是一个命令对象。 在这种情况下, 你可以对由一系列不同上下文连接而成的链执行相同的操作。
- 你可以同时使用命令和备忘录模式来实现 “撤销”。 在这种情况下, 命令用于对目标对象执行各种不同的操作, 备忘录用来保存一条命令执行前该对象的状态。
- 命令和策略模式看上去很像, 因为两者都能通过某些行为来参数化对象。 但是, 它们的意图有非常大的不同。
- 你可以使用命令来将任何操作转换为对象。 操作的参数将成为对象的成员变量。 你可以通过转换来延迟操作的执行、 将操作放入队列、 保存历史命令或者向远程服务发送命令等。
- 另一方面, 策略通常可用于描述完成某件事的不同方式, 让你能够在同一个上下文类中切换算法。
- 原型模式可用于保存命令的历史记录。
- 你可以将访问者模式视为命令模式的加强版本, 其对象可对不同类的多种对象执行操作。
- 责任链模式、 命令模式、 中介者模式和观察者模式用于处理请求发送者和接收者之间的不同连接方式:
# 2. 示例
// 请求者

type Button struct {
    command Command
}

func (b *Button) press() {
    b.command.execute()
}

// 命令接口

type Command interface {
    execute()
}

// 具体接口
type OnCommand struct {
    device Device
}

func (c *OnCommand) execute() {
    c.device.on()
}


type OffCommand struct {
    device Device
}

func (c *OffCommand) execute() {
    c.device.off()
}

// 接受者接口

type Device interface {
    on()
    off()
}
// 具体接受者

type Tv struct {
    isRunning bool
}

func (t *Tv) on() {
    t.isRunning = true
    fmt.Println("Turning tv on")
}

func (t *Tv) off() {
    t.isRunning = false
    fmt.Println("Turning tv off")
}

// main

func main() {
    tv := &Tv{}

    onCommand := &OnCommand{
        device: tv,
    }

    offCommand := &OffCommand{
        device: tv,
    }

    onButton := &Button{
        command: onCommand,
    }
    onButton.press()

    offButton := &Button{
        command: offCommand,
    }
    offButton.press()
}
2
3
4
5
6
7
8
9
10
11
12
13
14
15
16
17
18
19
20
21
22
23
24
25
26
27
28
29
30
31
32
33
34
35
36
37
38
39
40
41
42
43
44
45
46
47
48
49
50
51
52
53
54
55
56
57
58
59
60
61
62
63
64
65
66
67
68
69
70
71
72
73
74
75
76
77
78
79
80
# 迭代器模式 ★★★
# 1. 特点
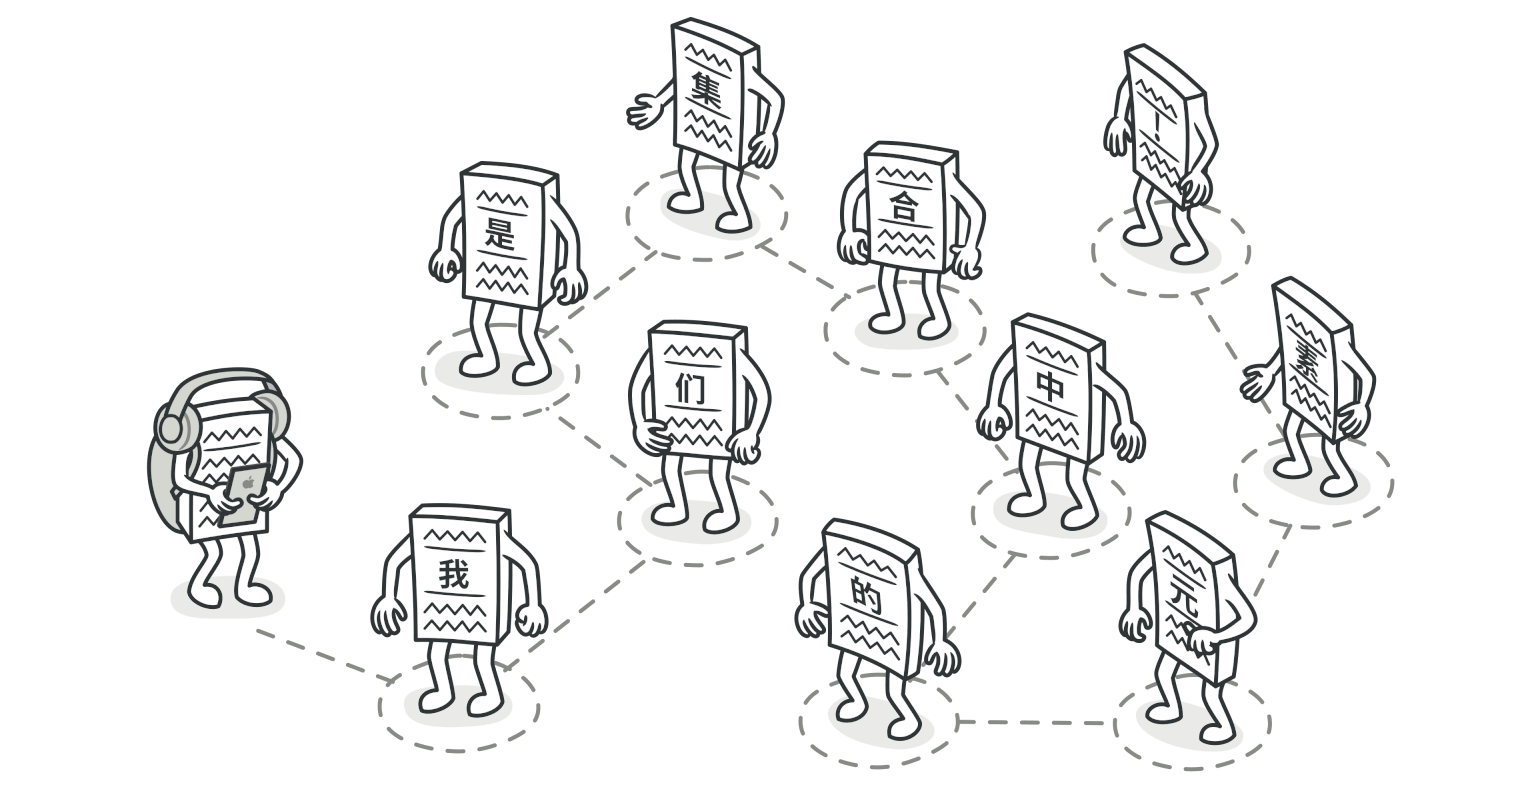
迭代器模式是一种行为设计模式, 让你能在不暴露集合底层表现形式 (列表、 栈和树等) 的情况下遍历集合中所有的元素。
- 在迭代器的帮助下, 客户端可以用一个迭代器接口以相似的方式遍历不同集合中的元素。
- 迭代器模式的主要思想是将集合背后的迭代逻辑提取至不同的、 名为迭代器的对象中。 此迭代器提供了一种泛型方法, 可用于在集合上进行迭代, 而又不受其类型影响。
适合应用场景
- 当集合背后为复杂的数据结构, 且你希望对客户端隐藏其复杂性时 (出于使用便利性或安全性的考虑), 可以使用迭代器模式。
- 使用该模式可以减少程序中重复的遍历代码。
- 如果你希望代码能够遍历不同的甚至是无法预知的数据结构, 可以使用迭代器模式。
优缺点
- 优点
- 单一职责原则。 通过将体积庞大的遍历算法代码抽取为独立的类, 你可对客户端代码和集合进行整理。
- 开闭原则。 你可实现新型的集合和迭代器并将其传递给现有代码, 无需修改现有代码。
- 你可以并行遍历同一集合, 因为每个迭代器对象都包含其自身的遍历状态。
- 相似的, 你可以暂停遍历并在需要时继续。
- 缺点
- 如果你的程序只与简单的集合进行交互, 应用该模式可能会矫枉过正。
- 对于某些特殊集合, 使用迭代器可能比直接遍历的效率低。
- 优点
与其他模式的关系
- 可以使用迭代器模式来遍历组合模式树。
- 可以同时使用工厂方法模式和迭代器来让子类集合返回不同类型的迭代器, 并使得迭代器与集合相匹配。
- 可以同时使用备忘录模式和迭代器来获取当前迭代器的状态, 并且在需要的时候进行回滚。
- 可以同时使用访问者模式和迭代器来遍历复杂数据结构, 并对其中的元素执行所需操作, 即使这些元素所属的类完全不同。
# 2. 示例
// 集合接口

type Collection interface {
    createIterator() Iterator
}

// 具体集合
type UserCollection struct {
    users []*User
}

func (u *UserCollection) createIterator() Iterator {
    return &UserIterator{
        users: u.users,
    }
}

// 迭代器
type Iterator interface {
    hasNext() bool
    getNext() *User
}


type UserIterator struct {
    index int
    users []*User
}

func (u *UserIterator) hasNext() bool {
    if u.index < len(u.users) {
        return true
    }
    return false

}
func (u *UserIterator) getNext() *User {
    if u.hasNext() {
        user := u.users[u.index]
        u.index++
        return user
    }
    return nil
}

// main


type User struct {
	name string
	age  int
}

func main() {

	user1 := &User{
		name: "a",
		age:  30,
	}
	user2 := &User{
		name: "b",
		age:  20,
	}

	userCollection := &UserCollection{
		users: []*User{user1, user2},
	}

	iterator := userCollection.createIterator()

	for iterator.hasNext() {
		user := iterator.getNext()
		fmt.Printf("User is %+v\n", user)
	}
}
2
3
4
5
6
7
8
9
10
11
12
13
14
15
16
17
18
19
20
21
22
23
24
25
26
27
28
29
30
31
32
33
34
35
36
37
38
39
40
41
42
43
44
45
46
47
48
49
50
51
52
53
54
55
56
57
58
59
60
61
62
63
64
65
66
67
68
69
70
71
72
73
74
75
76
# 中介者模式
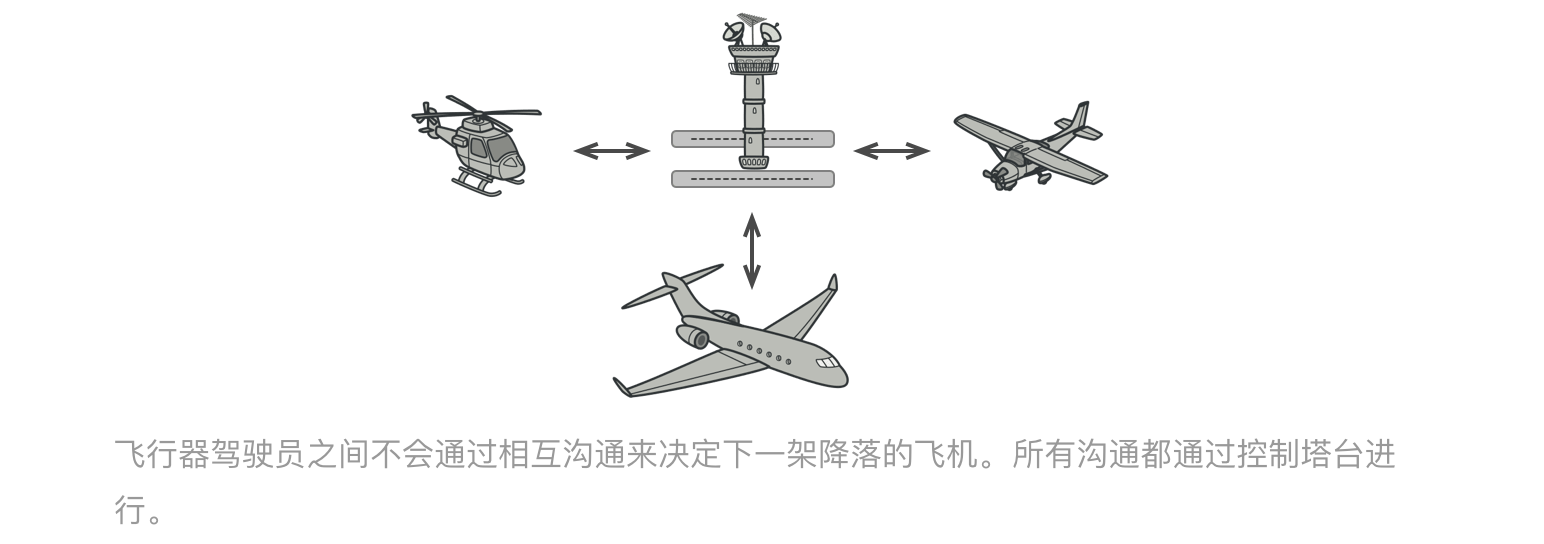
中介者模式是一种行为设计模式, 能让你减少对象之间混乱无序的依赖关系。 该模式会限制对象之间的直接交互, 迫使它们通过一个中介者对象进行合作。
适合应用场景
- 当一些对象和其他对象紧密耦合以致难以对其进行修改时, 可使用中介者模式。
- 当组件因过于依赖其他组件而无法在不同应用中复用时, 可使用中介者模式。
- 如果为了能在不同情景下复用一些基本行为, 导致你需要被迫创建大量组件子类时, 可使用中介者模式。
优缺点
- 优点
- 单一职责原则。 你可以将多个组件间的交流抽取到同一位置, 使其更易于理解和维护。
- 开闭原则。 你无需修改实际组件就能增加新的中介者。
- 你可以减轻应用中多个组件间的耦合情况。
- 你可以更方便地复用各个组件。
- 缺点
- 一段时间后, 中介者可能会演化成为上帝对象。
- 优点
# 备忘录模式 ★
快照、Snapshot、Memento
- 备忘录模式是一种行为设计模式, 允许在不暴露对象实现细节的情况下保存和恢复对象之前的状态。
- 适合应用场景
- 当你需要创建对象状态快照来恢复其之前的状态时, 可以使用备忘录模式。
- 当直接访问对象的成员变量、 获取器或设置器将导致封装被突破时, 可以使用该模式。
- 优缺点
- 优点
- 你可以在不破坏对象封装情况的前提下创建对象状态快照。
- 你可以通过让负责人维护原发器状态历史记录来简化原发器代码。
- 缺点
- 如果客户端过于频繁地创建备忘录, 程序将消耗大量内存。
- 负责人必须完整跟踪原发器的生命周期, 这样才能销毁弃用的备忘录。
- 绝大部分动态编程语言 (例如 PHP、 Python 和 JavaScript) 不能确保备忘录中的状态不被修改。
- 优点
- 与其他模式的关系
- 你可以同时使用命令模式和备忘录模式来实现 “撤销”。 在这种情况下, 命令用于对目标对象执行各种不同的操作, 备忘录用来保存一条命令执行前该对象的状态。
- 你可以同时使用备忘录和迭代器模式来获取当前迭代器的状态, 并且在需要的时候进行回滚。
- 有时候原型模式可以作为备忘录的一个简化版本, 其条件是你需要在历史记录中存储的对象的状态比较简单, 不需要链接其他外部资源, 或者链接可以方便地重建。
# 观察者模式 ★★★★
也叫:事件订阅者、监听者、Event-Subscriber、Listener、Observer
# 1. 特点
观察者模式是一种行为设计模式, 允许你定义一种订阅机制, 可在对象事件发生时通知多个 “观察” 该对象的其他对象。

适合应用场景
- 当一个对象状态的改变需要改变其他对象, 或实际对象是事先未知的或动态变化的时, 可使用观察者模式。
- 当应用中的一些对象必须观察其他对象时, 可使用该模式。 但仅能在有限时间内或特定情况下使用。
优缺点
- 优点
- 开闭原则。 你无需修改发布者代码就能引入新的订阅者类 (如果是发布者接口则可轻松引入发布者类)。
- 你可以在运行时建立对象之间的联系。
- 缺点
- 订阅者的通知顺序是随机的。
- 优点
与其他模式的关系
- 责任链模式、 命令模式、 中介者模式和观察者模式用于处理请求发送者和接收者之间的不同连接方式:
- 责任链按照顺序将请求动态传递给一系列的潜在接收者, 直至其中一名接收者对请求进行处理。
- 命令在发送者和请求者之间建立单向连接。
- 中介者清除了发送者和请求者之间的直接连接, 强制它们通过一个中介对象进行间接沟通。
- 观察者允许接收者动态地订阅或取消接收请求。
- 中介者和观察者之间的区别往往很难记住。 在大部分情况下, 你可以使用其中一种模式, 而有时可以同时使用。 让我们来看看如何做到这一点。
- 中介者的主要目标是消除一系列系统组件之间的相互依赖。 这些组件将依赖于同一个中介者对象。 观察者的目标是在对象之间建立动态的单向连接, 使得部分对象可作为其他对象的附属发挥作用。
- 责任链模式、 命令模式、 中介者模式和观察者模式用于处理请求发送者和接收者之间的不同连接方式:
# 2. 示例
package main

// 主体 接口
type Subject interface {
    register(observer Observer)
    deregister(observer Observer)
    notifyAll()
}

// 具体主体
type Item struct {
    observerList []Observer
    name         string
    inStock      bool
}

func newItem(name string) *Item {
    return &Item{
        name: name,
    }
}
func (i *Item) updateAvailability() {
    fmt.Printf("Item %s is now in stock\n", i.name)
    i.inStock = true
    i.notifyAll()
}
func (i *Item) register(o Observer) {
    i.observerList = append(i.observerList, o)
}

func (i *Item) deregister(o Observer) {
    i.observerList = removeFromslice(i.observerList, o)
}

func (i *Item) notifyAll() {
    for _, observer := range i.observerList {
        observer.update(i.name)
    }
}

func removeFromslice(observerList []Observer, observerToRemove Observer) []Observer {
    observerListLength := len(observerList)
    for i, observer := range observerList {
        if observerToRemove.getID() == observer.getID() {
            observerList[observerListLength-1], observerList[i] = observerList[i], observerList[observerListLength-1]
            return observerList[:observerListLength-1]
        }
    }
    return observerList
}

//观察者 接口

type Observer interface {
    update(string)
    getID() string
}

// 具体观察者

type Customer struct {
    id string
}

func (c *Customer) update(itemName string) {
    fmt.Printf("Sending email to customer %s for item %s\n", c.id, itemName)
}

func (c *Customer) getID() string {
    return c.id
}

// main

func main() {

    shirtItem := newItem("Nike Shirt")

    observerFirst := &Customer{id: "abc@gmail.com"}
    observerSecond := &Customer{id: "xyz@gmail.com"}

    shirtItem.register(observerFirst)
    shirtItem.register(observerSecond)

    shirtItem.updateAvailability()
}
2
3
4
5
6
7
8
9
10
11
12
13
14
15
16
17
18
19
20
21
22
23
24
25
26
27
28
29
30
31
32
33
34
35
36
37
38
39
40
41
42
43
44
45
46
47
48
49
50
51
52
53
54
55
56
57
58
59
60
61
62
63
64
65
66
67
68
69
70
71
72
73
74
75
76
77
78
79
80
81
82
83
84
85
86
# 状态模式 ★★
# 1. 特点
状态模式是一种行为设计模式, 让你能在一个对象的内部状态变化时改变其行为, 使其看上去就像改变了自身所属的类一样。
状态模式与有限状态机 的概念紧密相关。
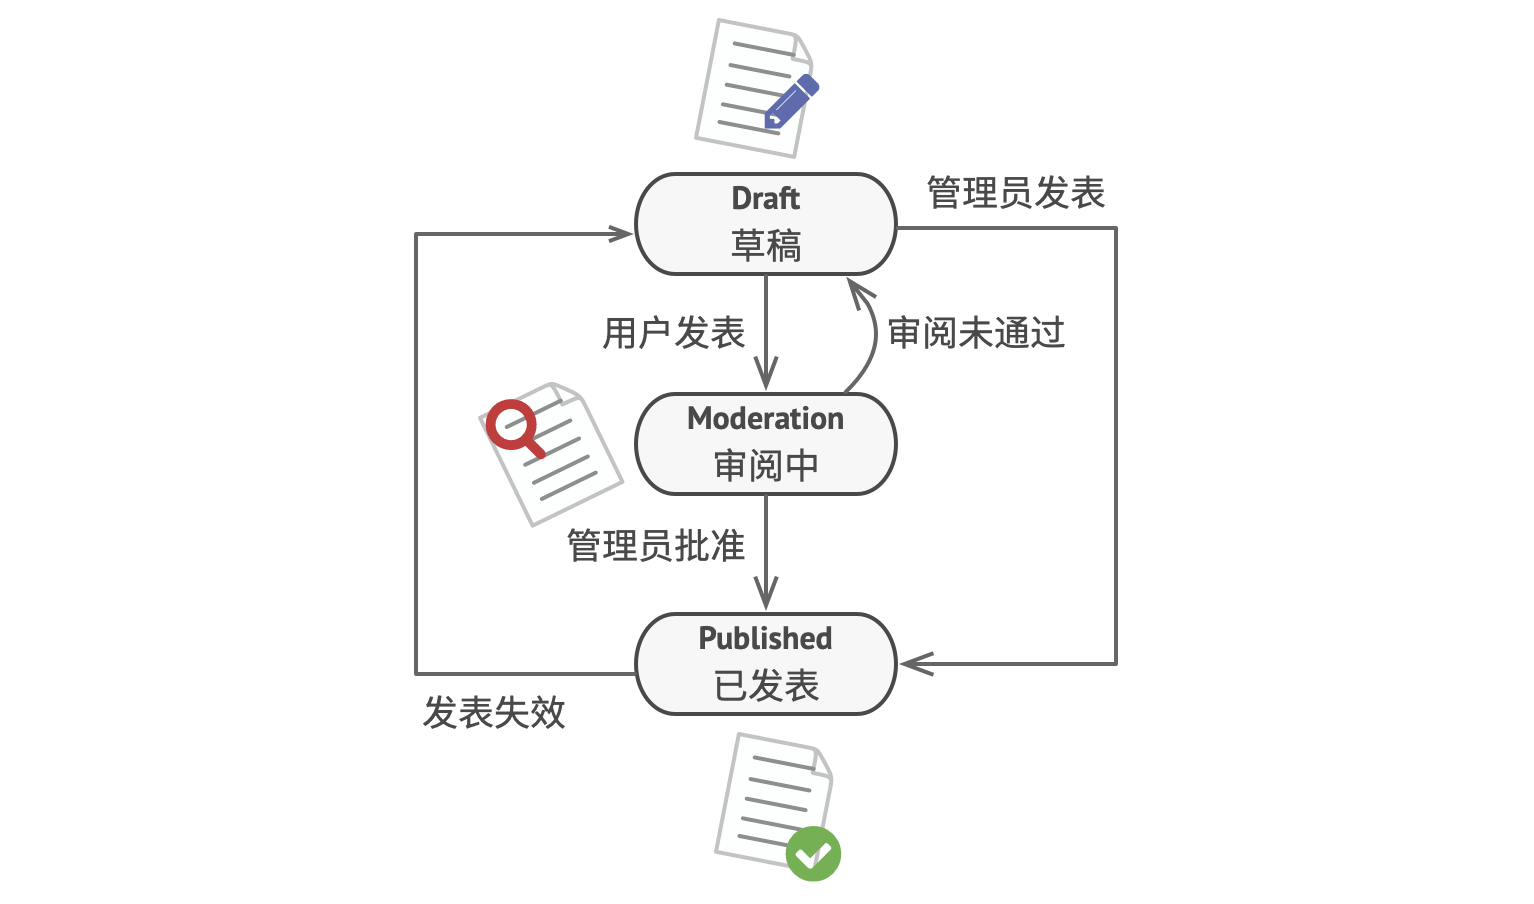
其主要思想是程序在任意时刻仅可处于几种有限的状态中。 在任何一个特定状态中, 程序的行为都不相同, 且可瞬间从一个状态切换到另一个状态。 不过, 根据当前状态, 程序可能会切换到另外一种状态, 也可能会保持当前状态不变。 这些数量有限且预先定义的状态切换规则被称为转移。
经典问题: 过多的if-else或者switch case等语句
适合应用场景
- 如果对象需要根据自身当前状态进行不同行为, 同时状态的数量非常多且与状态相关的代码会频繁变更的话, 可使用状态模式。
- 如果某个类需要根据成员变量的当前值改变自身行为, 从而需要使用大量的条件语句时, 可使用该模式。
- 当相似状态和基于条件的状态机转换中存在许多重复代码时, 可使用状态模式。
优缺点
- 优点
- 单一职责原则。 将与特定状态相关的代码放在单独的类中。
- 开闭原则。 无需修改已有状态类和上下文就能引入新状态。
- 通过消除臃肿的状态机条件语句简化上下文代码。
- 缺点
- 如果状态机只有很少的几个状态, 或者很少发生改变, 那么应用该模式可能会显得小题大作。
- 优点
与其他模式的关系
- 桥接模式、 状态模式和策略模式 (在某种程度上包括适配器模式) 模式的接口非常相似。 实际上, 它们都基于组合模式——即将工作委派给其他对象, 不过也各自解决了不同的问题。 模式并不只是以特定方式组织代码的配方, 你还可以使用它们来和其他开发者讨论模式所解决的问题。
- 状态可被视为策略的扩展。 两者都基于组合机制: 它们都通过将部分工作委派给 “帮手” 对象来改变其在不同情景下的行为。 策略使得这些对象相互之间完全独立, 它们不知道其他对象的存在。 但状态模式没有限制具体状态之间的依赖, 且允许它们自行改变在不同情景下的状态。
# 2. 示例
package main

import "fmt"
// 背景

type VendingMachine struct {
    hasItem       State
    itemRequested State
    hasMoney      State
    noItem        State

    currentState State

    itemCount int
    itemPrice int
}

func newVendingMachine(itemCount, itemPrice int) *VendingMachine {
    v := &VendingMachine{
        itemCount: itemCount,
        itemPrice: itemPrice,
    }
    hasItemState := &HasItemState{
        vendingMachine: v,
    }
    itemRequestedState := &ItemRequestedState{
        vendingMachine: v,
    }
    hasMoneyState := &HasMoneyState{
        vendingMachine: v,
    }
    noItemState := &NoItemState{
        vendingMachine: v,
    }

    v.setState(hasItemState)
    v.hasItem = hasItemState
    v.itemRequested = itemRequestedState
    v.hasMoney = hasMoneyState
    v.noItem = noItemState
    return v
}

func (v *VendingMachine) requestItem() error {
    return v.currentState.requestItem()
}

func (v *VendingMachine) addItem(count int) error {
    return v.currentState.addItem(count)
}

func (v *VendingMachine) insertMoney(money int) error {
    return v.currentState.insertMoney(money)
}

func (v *VendingMachine) dispenseItem() error {
    return v.currentState.dispenseItem()
}

func (v *VendingMachine) setState(s State) {
    v.currentState = s
}

func (v *VendingMachine) incrementItemCount(count int) {
    fmt.Printf("Adding %d items\n", count)
    v.itemCount = v.itemCount + count
}

// 状态接口

type State interface {
    addItem(int) error
    requestItem() error
    insertMoney(money int) error
    dispenseItem() error
}
// 具体状态  NoItemState

type NoItemState struct {
    vendingMachine *VendingMachine
}

func (i *NoItemState) requestItem() error {
    return fmt.Errorf("Item out of stock")
}

func (i *NoItemState) addItem(count int) error {
    i.vendingMachine.incrementItemCount(count)
    i.vendingMachine.setState(i.vendingMachine.hasItem)
    return nil
}

func (i *NoItemState) insertMoney(money int) error {
    return fmt.Errorf("Item out of stock")
}
func (i *NoItemState) dispenseItem() error {
    return fmt.Errorf("Item out of stock")
}


// 具体状态  HasItemState

type HasItemState struct {
    vendingMachine *VendingMachine
}

func (i *HasItemState) requestItem() error {
    if i.vendingMachine.itemCount == 0 {
        i.vendingMachine.setState(i.vendingMachine.noItem)
        return fmt.Errorf("No item present")
    }
    fmt.Printf("Item requestd\n")
    i.vendingMachine.setState(i.vendingMachine.itemRequested)
    return nil
}

func (i *HasItemState) addItem(count int) error {
    fmt.Printf("%d items added\n", count)
    i.vendingMachine.incrementItemCount(count)
    return nil
}

func (i *HasItemState) insertMoney(money int) error {
    return fmt.Errorf("Please select item first")
}
func (i *HasItemState) dispenseItem() error {
    return fmt.Errorf("Please select item first")
}

// 具体状态 ItemRequestedState

type ItemRequestedState struct {
    vendingMachine *VendingMachine
}

func (i *ItemRequestedState) requestItem() error {
    return fmt.Errorf("Item already requested")
}

func (i *ItemRequestedState) addItem(count int) error {
    return fmt.Errorf("Item Dispense in progress")
}

func (i *ItemRequestedState) insertMoney(money int) error {
    if money < i.vendingMachine.itemPrice {
        return fmt.Errorf("Inserted money is less. Please insert %d", i.vendingMachine.itemPrice)
    }
    fmt.Println("Money entered is ok")
    i.vendingMachine.setState(i.vendingMachine.hasMoney)
    return nil
}
func (i *ItemRequestedState) dispenseItem() error {
    return fmt.Errorf("Please insert money first")
}

// 具体状态 HasMoneyState

type HasMoneyState struct {
    vendingMachine *VendingMachine
}

func (i *HasMoneyState) requestItem() error {
    return fmt.Errorf("Item dispense in progress")
}

func (i *HasMoneyState) addItem(count int) error {
    return fmt.Errorf("Item dispense in progress")
}

func (i *HasMoneyState) insertMoney(money int) error {
    return fmt.Errorf("Item out of stock")
}
func (i *HasMoneyState) dispenseItem() error {
    fmt.Println("Dispensing Item")
    i.vendingMachine.itemCount = i.vendingMachine.itemCount - 1
    if i.vendingMachine.itemCount == 0 {
        i.vendingMachine.setState(i.vendingMachine.noItem)
    } else {
        i.vendingMachine.setState(i.vendingMachine.hasItem)
    }
    return nil
}

// main
func main() {
    vendingMachine := newVendingMachine(1, 10)

    err := vendingMachine.requestItem()
    if err != nil {
        log.Fatalf(err.Error())
    }

    err = vendingMachine.insertMoney(10)
    if err != nil {
        log.Fatalf(err.Error())
    }

    err = vendingMachine.dispenseItem()
    if err != nil {
        log.Fatalf(err.Error())
    }

    fmt.Println()

    err = vendingMachine.addItem(2)
    if err != nil {
        log.Fatalf(err.Error())
    }

    fmt.Println()

    err = vendingMachine.requestItem()
    if err != nil {
        log.Fatalf(err.Error())
    }

    err = vendingMachine.insertMoney(10)
    if err != nil {
        log.Fatalf(err.Error())
    }

    err = vendingMachine.dispenseItem()
    if err != nil {
        log.Fatalf(err.Error())
    }
}
2
3
4
5
6
7
8
9
10
11
12
13
14
15
16
17
18
19
20
21
22
23
24
25
26
27
28
29
30
31
32
33
34
35
36
37
38
39
40
41
42
43
44
45
46
47
48
49
50
51
52
53
54
55
56
57
58
59
60
61
62
63
64
65
66
67
68
69
70
71
72
73
74
75
76
77
78
79
80
81
82
83
84
85
86
87
88
89
90
91
92
93
94
95
96
97
98
99
100
101
102
103
104
105
106
107
108
109
110
111
112
113
114
115
116
117
118
119
120
121
122
123
124
125
126
127
128
129
130
131
132
133
134
135
136
137
138
139
140
141
142
143
144
145
146
147
148
149
150
151
152
153
154
155
156
157
158
159
160
161
162
163
164
165
166
167
168
169
170
171
172
173
174
175
176
177
178
179
180
181
182
183
184
185
186
187
188
189
190
191
192
193
194
195
196
197
198
199
200
201
202
203
204
205
206
207
208
209
210
211
212
213
214
215
216
217
218
219
220
221
222
223
224
225
226
# 策略模式 ★★★★
# 1. 特点
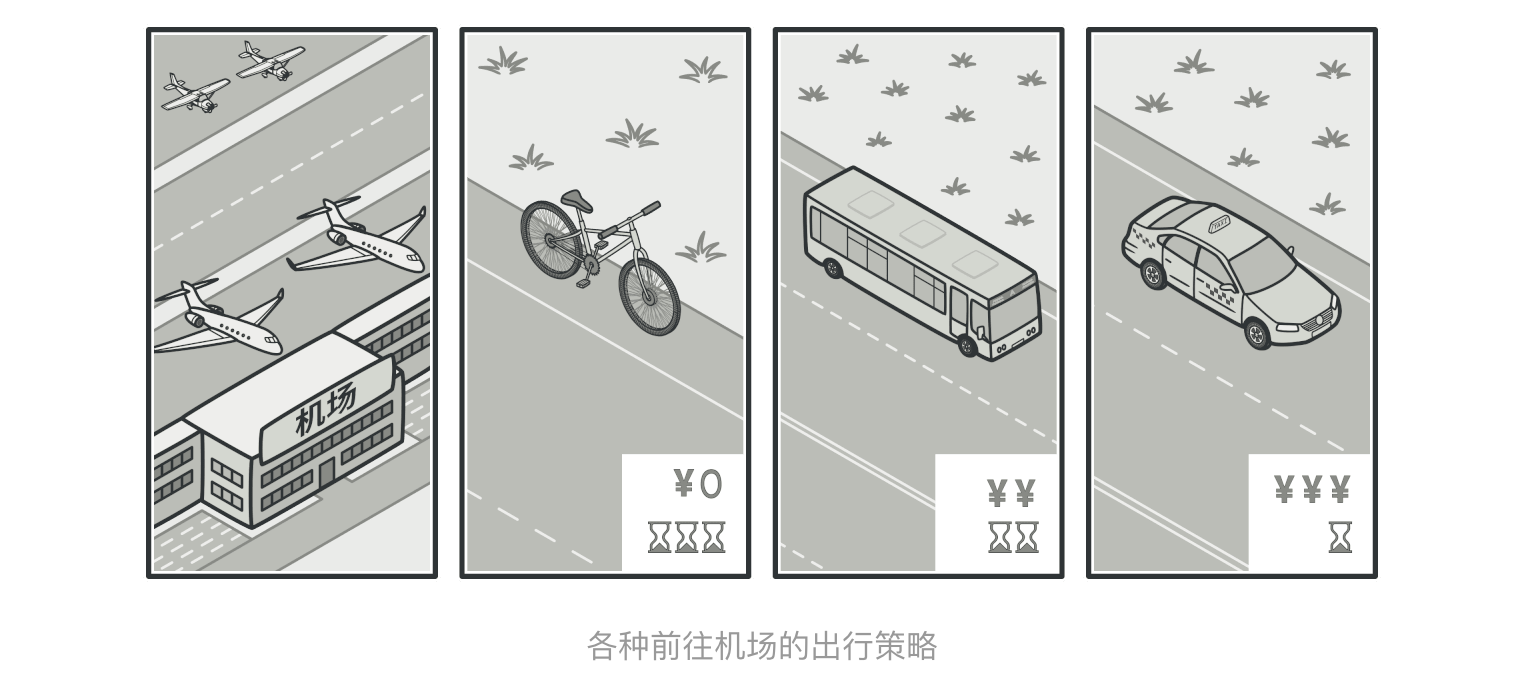
策略模式是一种行为设计模式, 它能让你定义一系列算法, 并将每种算法分别放入独立的类中, 以使算法的对象能够相互替换。
策略模式建议找出负责用许多不同方式完成特定任务的类, 然后将其中的算法抽取到一组被称为策略的独立类中。
名为上下文的原始类必须包含一个成员变量来存储对于每种策略的引用。 上下文并不执行任务, 而是将工作委派给已连接的策略对象。
上下文不负责选择符合任务需要的算法——客户端会将所需策略传递给上下文。 实际上, 上下文并不十分了解策略, 它会通过同样的通用接口与所有策略进行交互, 而该接口只需暴露一个方法来触发所选策略中封装的算法即可。
上下文可独立于具体策略。 这样你就可在不修改上下文代码或其他策略的情况下添加新算法或修改已有算法了。
适合应用场景
- 当你想使用对象中各种不同的算法变体, 并希望能在运行时切换算法时, 可使用策略模式。
- 当你有许多仅在执行某些行为时略有不同的相似类时, 可使用策略模式。
- 如果算法在上下文的逻辑中不是特别重要, 使用该模式能将类的业务逻辑与其算法实现细节隔离开来。
- 当类中使用了复杂条件运算符以在同一算法的不同变体中切换时, 可使用该模式。
优缺点
- 优点
- 你可以在运行时切换对象内的算法。
- 你可以将算法的实现和使用算法的代码隔离开来。
- 你可以使用组合来代替继承。
- 开闭原则。 你无需对上下文进行修改就能够引入新的策略。
- 缺点
- 如果你的算法极少发生改变, 那么没有任何理由引入新的类和接口。 使用该模式只会让程序过于复杂。
- 客户端必须知晓策略间的不同——它需要选择合适的策略。
- 许多现代编程语言支持函数类型功能, 允许你在一组匿名函数中实现不同版本的算法。 这样, 你使用这些函数的方式就和使用策略对象时完全相同, 无需借助额外的类和接口来保持代码简洁。
- 优点
与其他模式的关系
- 桥接模式、 状态模式和策略模式 (在某种程度上包括适配器模式) 模式的接口非常相似。 实际上, 它们都基于组合模式——即将工作委派给其他对象, 不过也各自解决了不同的问题。 模式并不只是以特定方式组织代码的配方, 你还可以使用它们来和其他开发者讨论模式所解决的问题。
- 命令模式和策略看上去很像, 因为两者都能通过某些行为来参数化对象。 但是, 它们的意图有非常大的不同。\
- 使用命令来将任何操作转换为对象。 操作的参数将成为对象的成员变量。 你可以通过转换来延迟操作的执行、 将操作放入队列、 保存历史命令或者向远程服务发送命令等。
- 策略通常可用于描述完成某件事的不同方式, 让你能够在同一个上下文类中切换算法。
- 装饰模式可让你更改对象的外表, 策略则让你能够改变其本质。
- 模板方法模式基于继承机制: 它允许你通过扩展子类中的部分内容来改变部分算法。 策略基于组合机制: 你可以通过对相应行为提供不同的策略来改变对象的部分行为。 模板方法在类层次上运作, 因此它是静态的。 策略在对象层次上运作, 因此允许在运行时切换行为。
- 状态可被视为策略的扩展。 两者都基于组合机制: 它们都通过将部分工作委派给 “帮手” 对象来改变其在不同情景下的行为。 策略使得这些对象相互之间完全独立, 它们不知道其他对象的存在。 但状态模式没有限制具体状态之间的依赖, 且允许它们自行改变在不同情景下的状态。
# 2. 示例
- 最少最近使用 (LRU): 移除最近使用最少的一条条目。
- 先进先出 (FIFO): 移除最早创建的条目。
- 最少使用 (LFU): 移除使用频率最低一条条目。
package main

// 策略接口

type EvictionAlgo interface {
    evict(c *Cache)
}

// 具体策略
type Fifo struct {
}

func (l *Fifo) evict(c *Cache) {
    fmt.Println("Evicting by fifo strtegy")
}


type Lru struct {
}

func (l *Lru) evict(c *Cache) {
    fmt.Println("Evicting by lru strtegy")
}


type Lfu struct {
}

func (l *Lfu) evict(c *Cache) {
    fmt.Println("Evicting by lfu strtegy")
}

// cache

type Cache struct {
    storage      map[string]string
    evictionAlgo EvictionAlgo
    capacity     int
    maxCapacity  int
}

func initCache(e EvictionAlgo) *Cache {
    storage := make(map[string]string)
    return &Cache{
        storage:      storage,
        evictionAlgo: e,
        capacity:     0,
        maxCapacity:  2,
    }
}

func (c *Cache) setEvictionAlgo(e EvictionAlgo) {
    c.evictionAlgo = e
}

func (c *Cache) add(key, value string) {
    if c.capacity == c.maxCapacity {
        c.evict()
    }
    c.capacity++
    c.storage[key] = value
}

func (c *Cache) get(key string) {
    delete(c.storage, key)
}

func (c *Cache) evict() {
    c.evictionAlgo.evict(c)
    c.capacity--
}

// main

func main() {
	lfu := &Lfu{}
	cache := initCache(lfu)

	cache.add("a", "1")
	cache.add("b", "2")

	cache.add("c", "3")

	lru := &Lru{}
	cache.setEvictionAlgo(lru)

	cache.add("d", "4")

	fifo := &Fifo{}
	cache.setEvictionAlgo(fifo)

	cache.add("e", "5")

}
2
3
4
5
6
7
8
9
10
11
12
13
14
15
16
17
18
19
20
21
22
23
24
25
26
27
28
29
30
31
32
33
34
35
36
37
38
39
40
41
42
43
44
45
46
47
48
49
50
51
52
53
54
55
56
57
58
59
60
61
62
63
64
65
66
67
68
69
70
71
72
73
74
75
76
77
78
79
80
81
82
83
84
85
86
87
88
89
90
91
92
93
94
95
# 模板方法模式 ★★
# 1. 特点
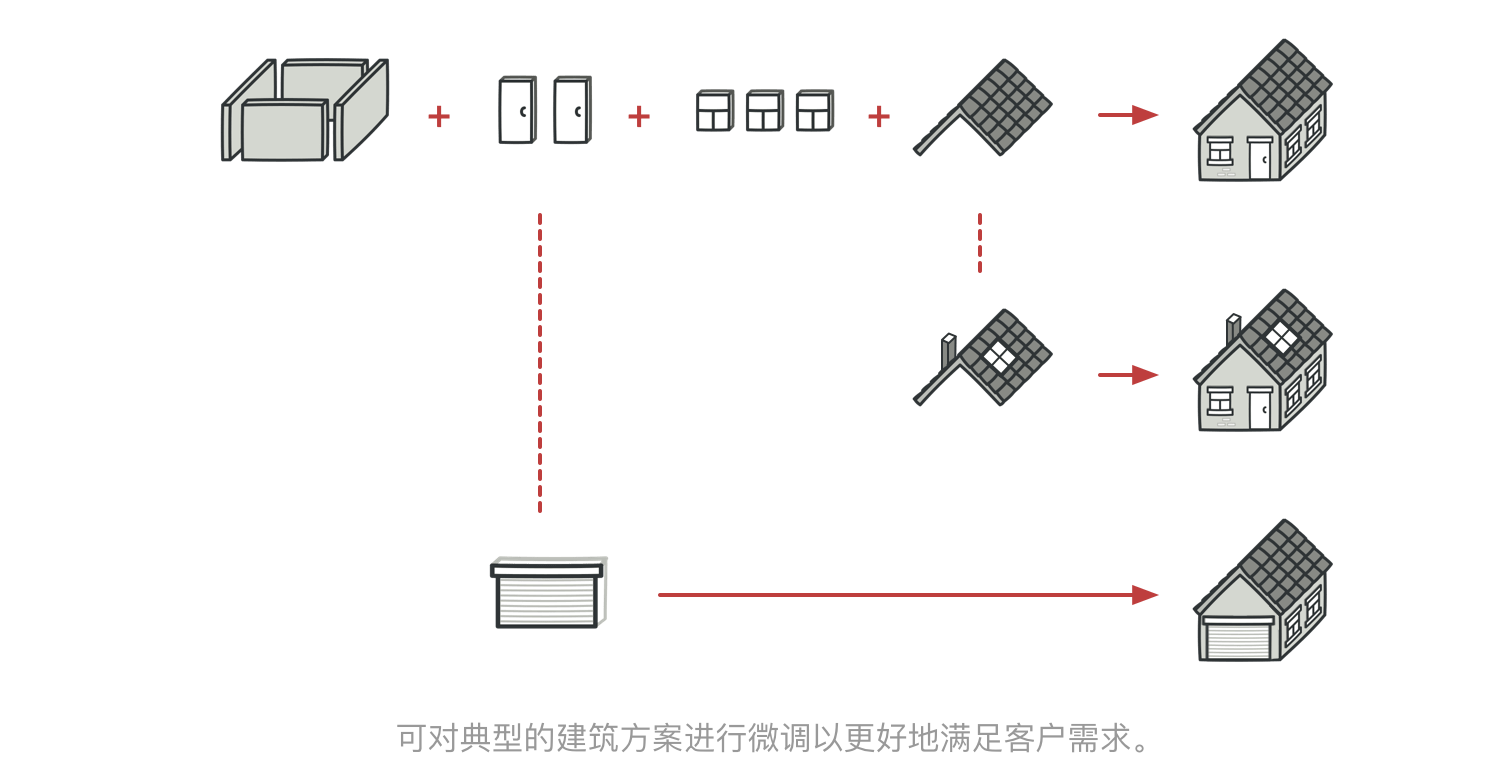
模板方法模式是一种行为设计模式, 它在超类中定义了一个算法的框架, 允许子类在不修改结构的情况下重写算法的特定步骤。
适合应用场景
- 当你只希望客户端扩展某个特定算法步骤, 而不是整个算法或其结构时, 可使用模板方法模式。
- 当多个类的算法除一些细微不同之外几乎完全一样时, 你可使用该模式。 但其后果就是, 只要算法发生变化, 你就可能需要修改所有的类。
优缺点
- 优点
- 你可仅允许客户端重写一个大型算法中的特定部分, 使得算法其他部分修改对其所造成的影响减小。
- 你可将重复代码提取到一个超类中。
- 缺点
- 部分客户端可能会受到算法框架的限制。
- 通过子类抑制默认步骤实现可能会导致违反里氏替换原则。
- 模板方法中的步骤越多, 其维护工作就可能会越困难。
- 优点
与其他模式的关系
- 工厂方法模式是模板方法模式的一种特殊形式。 同时, 工厂方法可以作为一个大型模板方法中的一个步骤。
- 模板方法基于继承机制: 它允许你通过扩展子类中的部分内容来改变部分算法。 策略模式基于组合机制: 你可以通过对相应行为提供不同的策略来改变对象的部分行为。 模板方法在类层次上运作, 因此它是静态的。 策略在对象层次上运作, 因此允许在运行时切换行为。
# 2. 示例
// 模板方法
package main

type IOtp interface {
    genRandomOTP(int) string
    saveOTPCache(string)
    getMessage(string) string
    sendNotification(string) error
}

// type otp struct {
// }

// func (o *otp) genAndSendOTP(iOtp iOtp, otpLength int) error {
//  otp := iOtp.genRandomOTP(otpLength)
//  iOtp.saveOTPCache(otp)
//  message := iOtp.getMessage(otp)
//  err := iOtp.sendNotification(message)
//  if err != nil {
//      return err
//  }
//  return nil
// }

type Otp struct {
    iOtp IOtp
}

func (o *Otp) genAndSendOTP(otpLength int) error {
    otp := o.iOtp.genRandomOTP(otpLength)
    o.iOtp.saveOTPCache(otp)
    message := o.iOtp.getMessage(otp)
    err := o.iOtp.sendNotification(message)
    if err != nil {
        return err
    }
    return nil
}

// 具体实施

type Sms struct {
    Otp
}

func (s *Sms) genRandomOTP(len int) string {
    randomOTP := "1234"
    fmt.Printf("SMS: generating random otp %s\n", randomOTP)
    return randomOTP
}

func (s *Sms) saveOTPCache(otp string) {
    fmt.Printf("SMS: saving otp: %s to cache\n", otp)
}

func (s *Sms) getMessage(otp string) string {
    return "SMS OTP for login is " + otp
}

func (s *Sms) sendNotification(message string) error {
    fmt.Printf("SMS: sending sms: %s\n", message)
    return nil
}

// 具体实施
type Email struct {
    Otp
}

func (s *Email) genRandomOTP(len int) string {
    randomOTP := "1234"
    fmt.Printf("EMAIL: generating random otp %s\n", randomOTP)
    return randomOTP
}

func (s *Email) saveOTPCache(otp string) {
    fmt.Printf("EMAIL: saving otp: %s to cache\n", otp)
}

func (s *Email) getMessage(otp string) string {
    return "EMAIL OTP for login is " + otp
}

func (s *Email) sendNotification(message string) error {
    fmt.Printf("EMAIL: sending email: %s\n", message)
    return nil
}

// main
func main() {
    // otp := otp{}

    // smsOTP := &sms{
    //  otp: otp,
    // }

    // smsOTP.genAndSendOTP(smsOTP, 4)

    // emailOTP := &email{
    //  otp: otp,
    // }
    // emailOTP.genAndSendOTP(emailOTP, 4)
    // fmt.Scanln()
    smsOTP := &Sms{}
    o := Otp{
        iOtp: smsOTP,
    }
    o.genAndSendOTP(4)

    fmt.Println("")
    emailOTP := &Email{}
    o = Otp{
        iOtp: emailOTP,
    }
    o.genAndSendOTP(4)

}
2
3
4
5
6
7
8
9
10
11
12
13
14
15
16
17
18
19
20
21
22
23
24
25
26
27
28
29
30
31
32
33
34
35
36
37
38
39
40
41
42
43
44
45
46
47
48
49
50
51
52
53
54
55
56
57
58
59
60
61
62
63
64
65
66
67
68
69
70
71
72
73
74
75
76
77
78
79
80
81
82
83
84
85
86
87
88
89
90
91
92
93
94
95
96
97
98
99
100
101
102
103
104
105
106
107
108
109
110
111
112
113
114
115
116
117
# 访问者模式 ★★
# 1. 特点
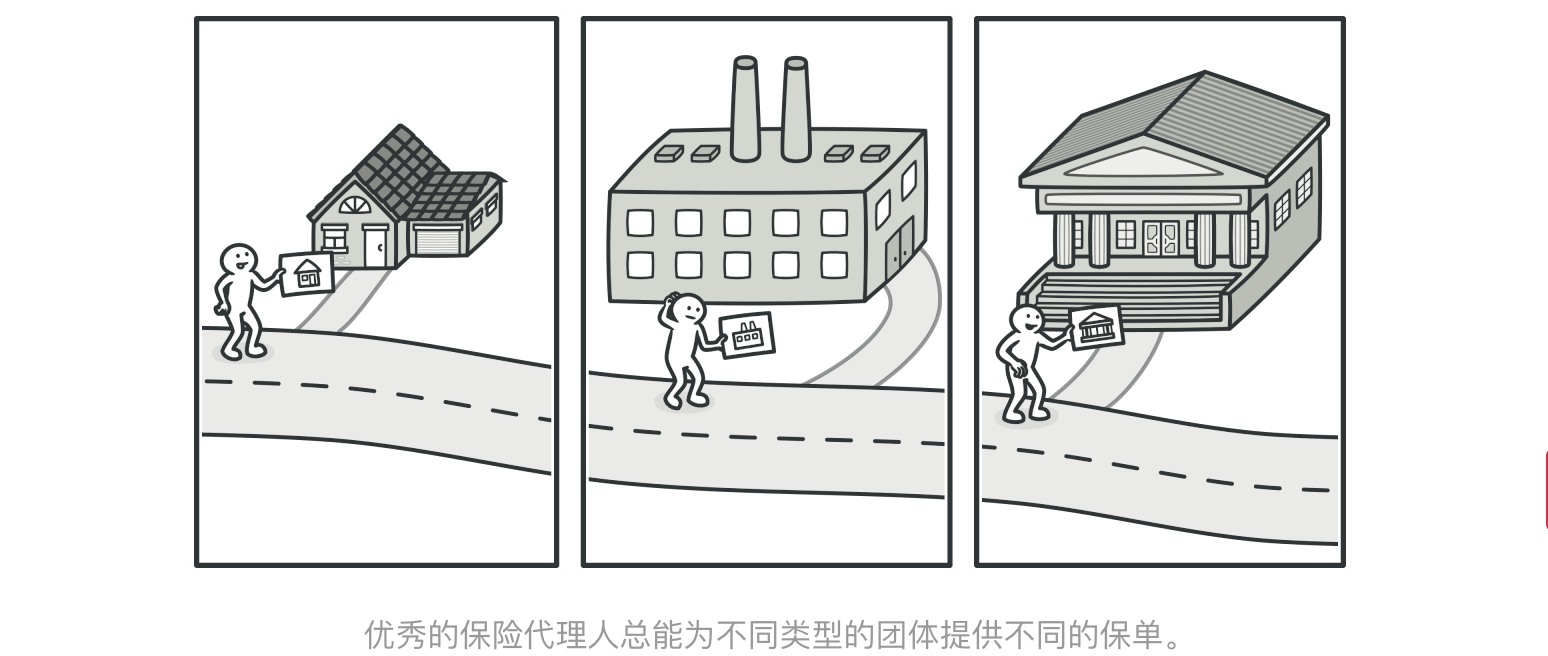
访问者模式是一种行为设计模式, 它能将算法与其所作用的对象隔离开来。允许你在不修改已有代码的情况下向已有类层次结构中增加新的行为。
适合应用场景
- 如果你需要对一个复杂对象结构 (例如对象树) 中的所有元素执行某些操作, 可使用访问者模式。
- 可使用访问者模式来清理辅助行为的业务逻辑。
- 当某个行为仅在类层次结构中的一些类中有意义, 而在其他类中没有意义时, 可使用该模式。
优缺点
- 优点
- 开闭原则。 你可以引入在不同类对象上执行的新行为, 且无需对这些类做出修改。
- 单一职责原则。 可将同一行为的不同版本移到同一个类中。
- 访问者对象可以在与各种对象交互时收集一些有用的信息。 当你想要遍历一些复杂的对象结构 (例如对象树), 并在结构中的每个对象上应用访问者时, 这些信息可能会有所帮助。
- 缺点
- 开闭原则。 你可以引入在不同类对象上执行的新行为, 且无需对这些类做出修改。
- 单一职责原则。 可将同一行为的不同版本移到同一个类中。
- 访问者对象可以在与各种对象交互时收集一些有用的信息。 当你想要遍历一些复杂的对象结构 (例如对象树), 并在结构中的每个对象上应用访问者时, 这些信息可能会有所帮助。
- 优点
与其他模式的关系
- 开闭原则。 你可以引入在不同类对象上执行的新行为, 且无需对这些类做出修改。
- 单一职责原则。 可将同一行为的不同版本移到同一个类中。
- 访问者对象可以在与各种对象交互时收集一些有用的信息。 当你想要遍历一些复杂的对象结构 (例如对象树), 并在结构中的每个对象上应用访问者时, 这些信息可能会有所帮助。
# 2. 示例
// 形状接口

type Shape interface {
    getType() string
    accept(Visitor)
}

// 方形

type Square struct {
    side int
}

func (s *Square) accept(v Visitor) {
    v.visitForSquare(s)
}

func (s *Square) getType() string {
    return "Square"
}
// 圆形

type Circle struct {
    radius int
}

func (c *Circle) accept(v Visitor) {
    v.visitForCircle(c)
}

func (c *Circle) getType() string {
    return "Circle"
}
// 三角形

type Rectangle struct {
    l int
    b int
}

func (t *Rectangle) accept(v Visitor) {
    v.visitForrectangle(t)
}

func (t *Rectangle) getType() string {
    return "rectangle"
}

// 访问者

type Visitor interface {
    visitForSquare(*Square)
    visitForCircle(*Circle)
    visitForrectangle(*Rectangle)
}


type AreaCalculator struct {
    area int
}

func (a *AreaCalculator) visitForSquare(s *Square) {
    // Calculate area for square.
    // Then assign in to the area instance variable.
    fmt.Println("Calculating area for square")
}

func (a *AreaCalculator) visitForCircle(s *Circle) {
    fmt.Println("Calculating area for circle")
}
func (a *AreaCalculator) visitForrectangle(s *Rectangle) {
    fmt.Println("Calculating area for rectangle")
}


type MiddleCoordinates struct {
    x int
    y int
}

func (a *MiddleCoordinates) visitForSquare(s *Square) {
    // Calculate middle point coordinates for square.
    // Then assign in to the x and y instance variable.
    fmt.Println("Calculating middle point coordinates for square")
}

func (a *MiddleCoordinates) visitForCircle(c *Circle) {
    fmt.Println("Calculating middle point coordinates for circle")
}
func (a *MiddleCoordinates) visitForrectangle(t *Rectangle) {
    fmt.Println("Calculating middle point coordinates for rectangle")
}


// main


func main() {
    square := &Square{side: 2}
    circle := &Circle{radius: 3}
    rectangle := &Rectangle{l: 2, b: 3}

    areaCalculator := &AreaCalculator{}

    square.accept(areaCalculator)
    circle.accept(areaCalculator)
    rectangle.accept(areaCalculator)

    fmt.Println()
    middleCoordinates := &MiddleCoordinates{}
    square.accept(middleCoordinates)
    circle.accept(middleCoordinates)
    rectangle.accept(middleCoordinates)
}
2
3
4
5
6
7
8
9
10
11
12
13
14
15
16
17
18
19
20
21
22
23
24
25
26
27
28
29
30
31
32
33
34
35
36
37
38
39
40
41
42
43
44
45
46
47
48
49
50
51
52
53
54
55
56
57
58
59
60
61
62
63
64
65
66
67
68
69
70
71
72
73
74
75
76
77
78
79
80
81
82
83
84
85
86
87
88
89
90
91
92
93
94
95
96
97
98
99
100
101
102
103
104
105
106
107
108
109
110
111
112
113
114
115
